Introducing Frontier’s New Feature: Code Injection2 min read
Reading Time: 2 minutesWe are excited to announce the release of a powerful new feature in Frontier: Code Injection. This feature enhances your ability to seamlessly integrate generated code from Figma into your existing projects, saving time and reducing the need for manual copy-pasting.
Why Did We Create Code Injection? 🤔
- We noticed that many of our users were exporting only parts of the code from Figma, often leading to broken implementations. A complete component needs all its pieces— index (TSX or JSX), CSS, assets, and the right styleguide references—to work properly.
- We heard from you that manually copying and pasting each file was quite tedious. Downloading assets from one place and uploading them to another? Yawn! 😴
We knew there had to be a better way. Enter Code Injection. We developed this feature to streamline your workflow, making the process of integrating design into development as seamless as possible.
How Does It Work? 🛠️
Example Scenario: Implementing a Subscribe Modal Component
The Figma Design:

You open the Figma design and see that it includes:
- A few input fields (that you already have in your code ✅ – <Input>)
- A submit button (that you haven’t created in code yet ⭕️)
- A checkbox (that you haven’t created in code yet ⭕️)
- Some text and an icon (non-component elements)
1. Provide your design to Frontier in VScode
- Paste the Figma link
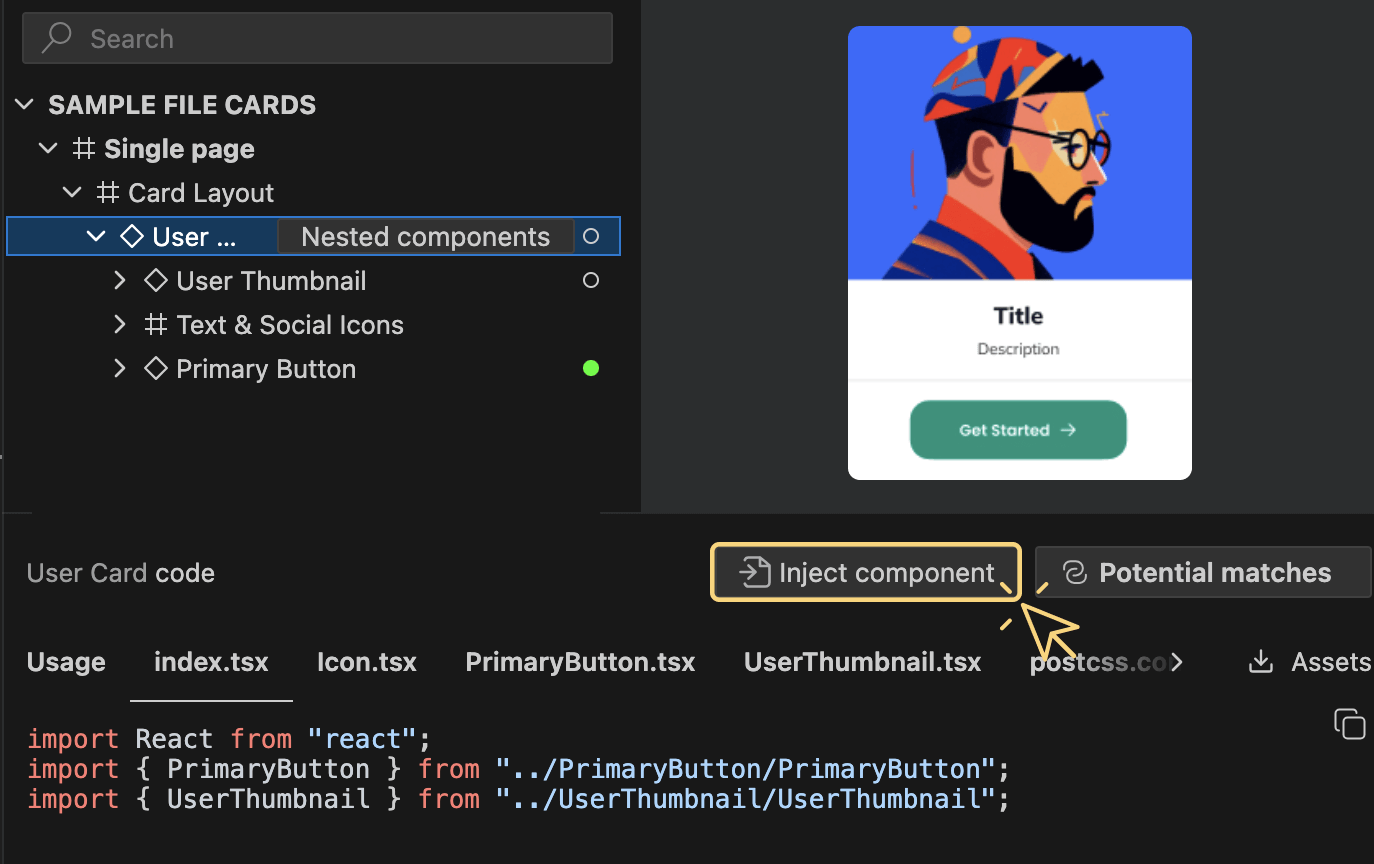
- Select the Modal component
- Click “Inject component”
2. The Injection magic:
- Frontier will detect that you already have an <input> component, but missing the <button> and <checkbox> components.
- Frontier will generate and inject the <button> and <checkbox> components to your source code, with all the necessary folders and files (e.g., tsx, CSS, assets).
- Frontier will build a <Modal> component:
- Components: imports your existing <input> component and the newly generated <button> and <checkbox> components
- Non-Component Elements: Frontier includes inline code for simple elements like text and icons directly within the generated component.
Code example
Here’s how the code for a “Modal” component might look after using Code Injection: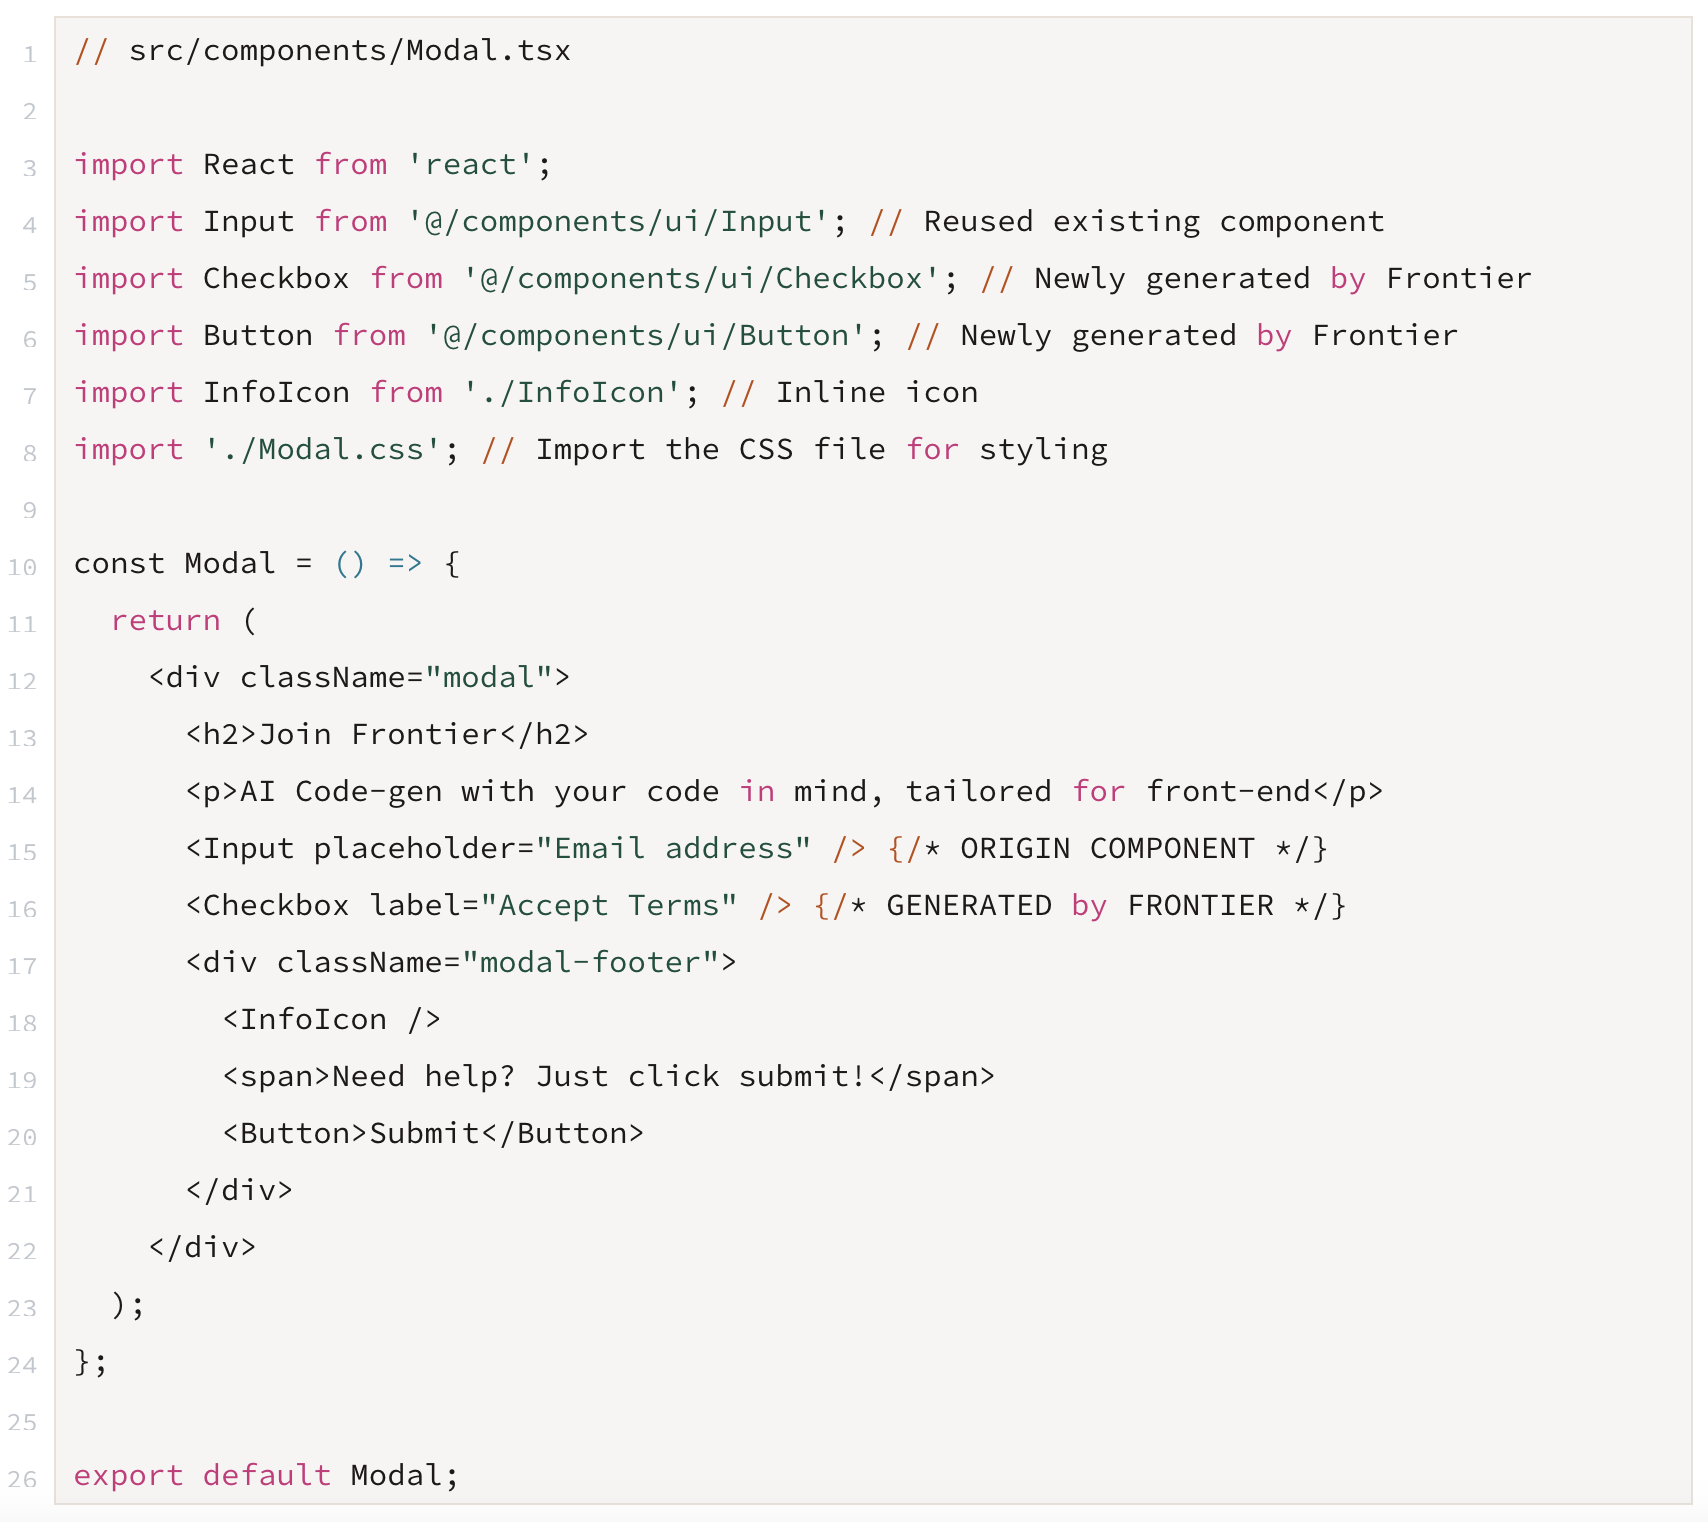
Get Started 🚀
Try out the new Code Injection feature today and streamline your design-to-code workflow with Frontier! Your feedback is crucial as we continue to enhance Frontier’s capabilities.
Why Use Code Injection? 🌟
- Efficiency: Automatically generate and integrate components directly into your project, reducing manual coding effort.
- All-in-One: Generate your component with all its necessary files and assets in one click, streamlining your workflow.
Feel free to reach out if you have any questions or need assistance. We’re here to support your journey to more efficient and consistent coding!
Happy coding! ✨

 Figma
Figma Adobe XD
 Sketch